Activities

The Activities module allows tracking of various activities (tasks, data, records, etc.) according to predefined templates (attributes), which users assign to individual days. Thanks to its universal application, activities can be used for different purposes, such as assigning tasks to employees, monitoring hours worked on a project, tracking the number of products manufactured, and more.

Activities can be enabled in Administration Companyedit Company(Advanced Mode)Applicationtab Function tab. Here, you can also choose whether to clone activities, i.e., whether you want to copy an existing activity. For this purpose, there is an icon in AdministrationActivities, which allows you to copy and then edit your activities.

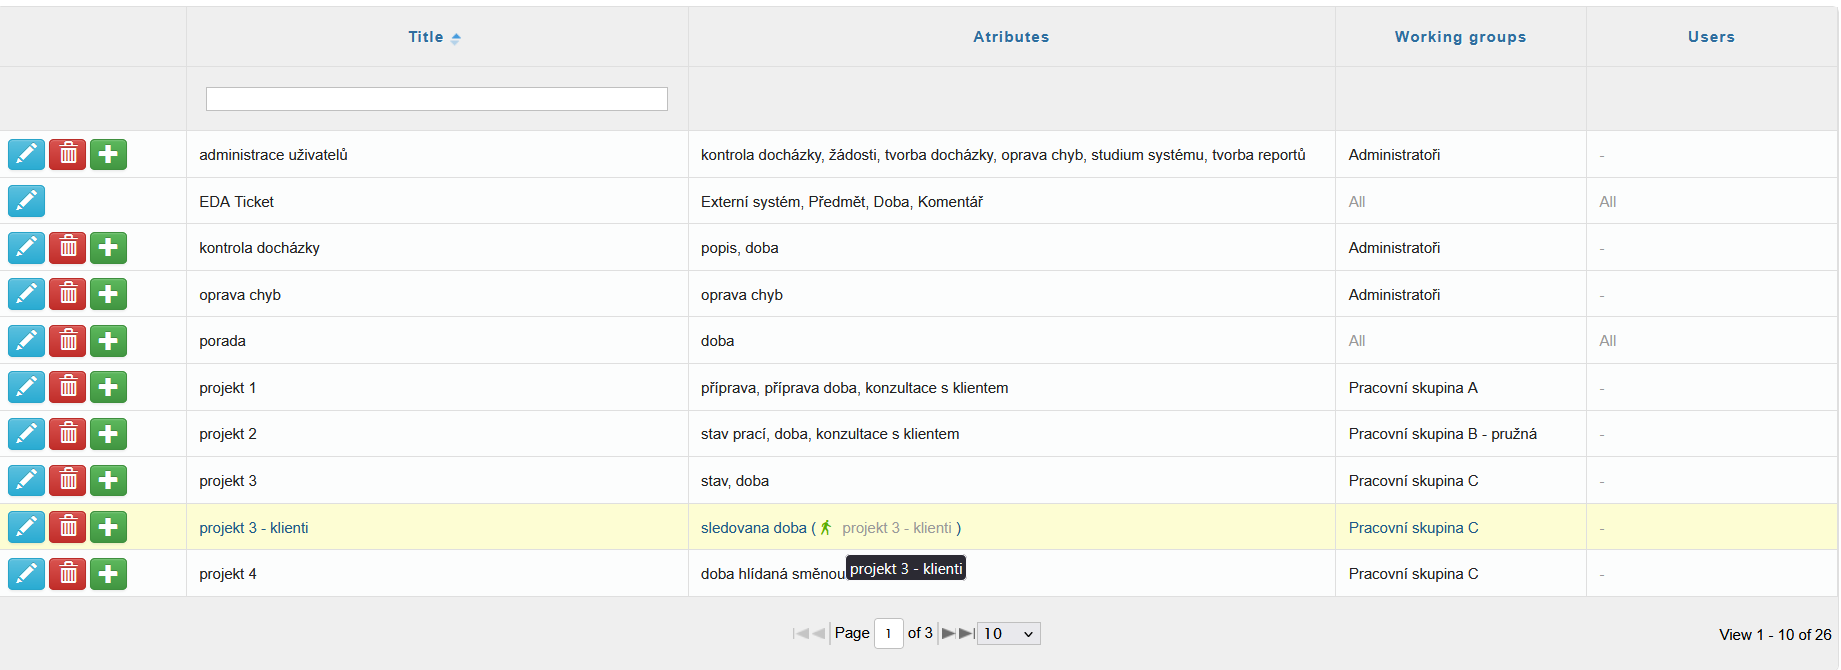
Activities that users enter are created in AdministrationActivities. This is a template that defines the content of the activity.

New buttons have also been added to the left side panel under Home – Tabs( and ), where approved activities and activities waiting for approval will be displayed.

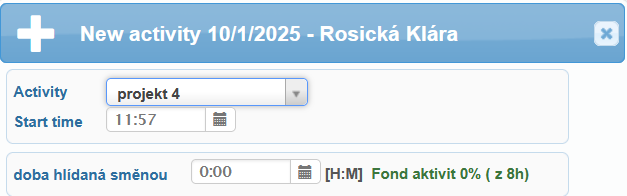
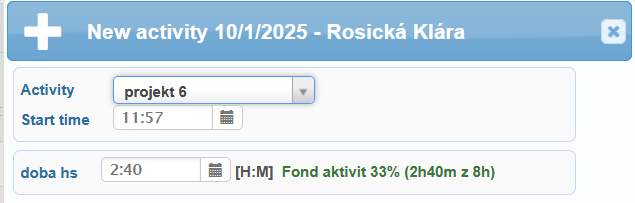
Activities can be entered (Add) and viewed (Activity Preview, Summary preview of activity) in the web or mobile app under the Plan, Activity Preview, or Summary preview of activity tabs.

Activities can also be displayed through activity reports.

Your SYSDO attendance can also be integrated with the EDA ticketing system, which significantly simplifies and enhances activity management. More information can be found in this article, and a detailed guide for integrating the systems is available here.

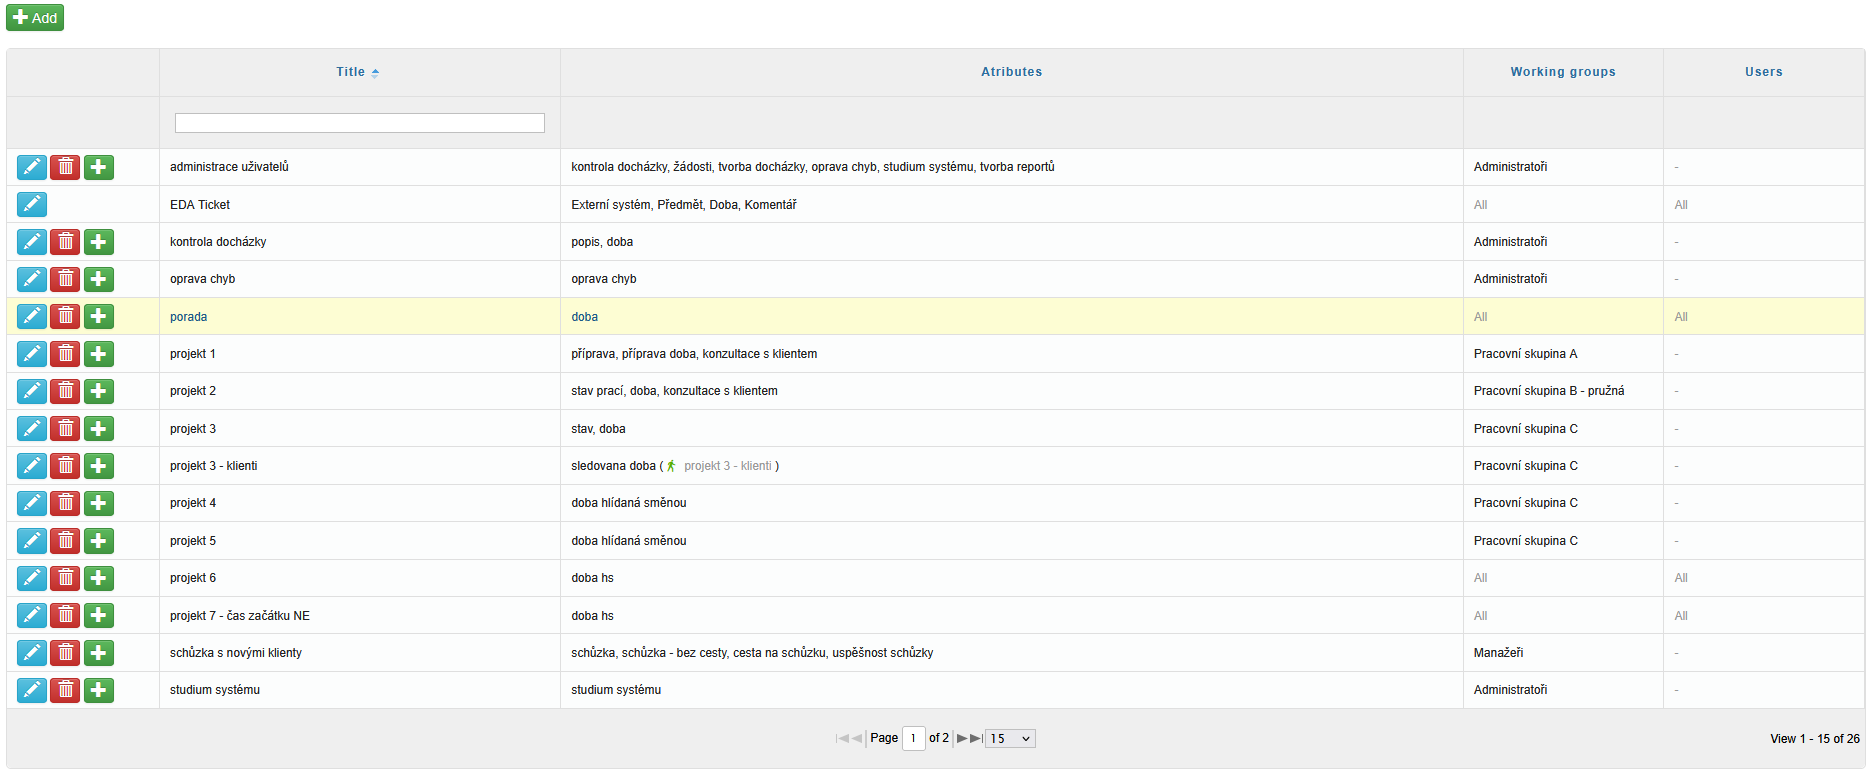
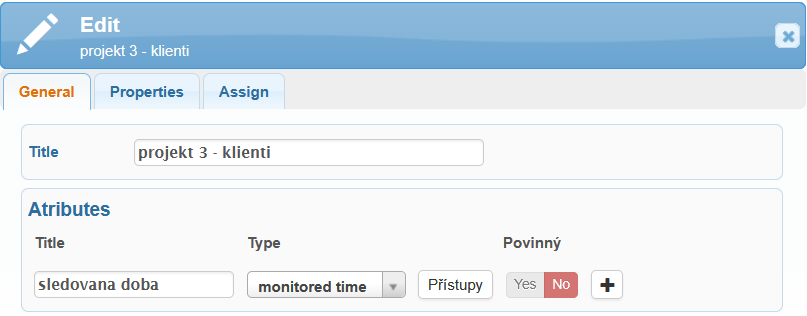
An activity has its own title, attributes, and can be assigned either to a working group or to specific users.

There are several types of attributes:

Each attribute also has its own title and can be set as either mandatory or optional. If the attribute is mandatory, its value must be filled in when creating the activity.

A new attribute can be added by clicking the Add new attribute button (), removed using the Delete this attribute button (), and reordered up or down using the arrow buttons (,).

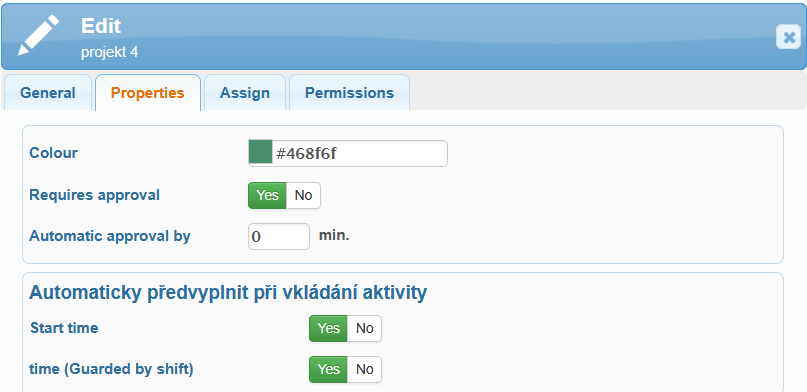
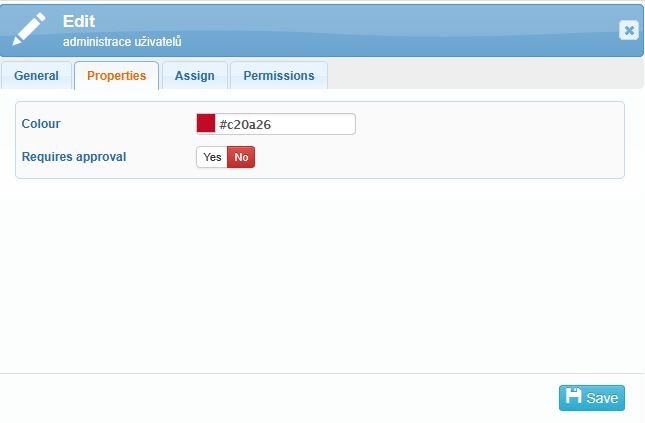
In the Properties tab, you can select a color, which will then be displayed in the Progress column in the Summary preview of activity tab.

In the Requires Approval section, you can set whether the newly created activity must be approved by an administrator before it is added to a user’s plan.

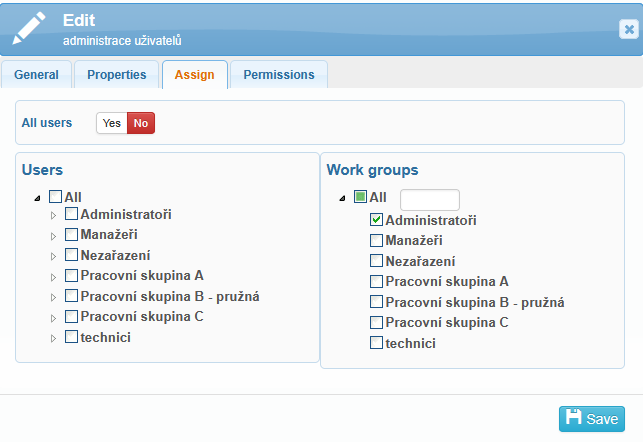
In the Assign tab, activities can be assigned only to specific users or workgroups.

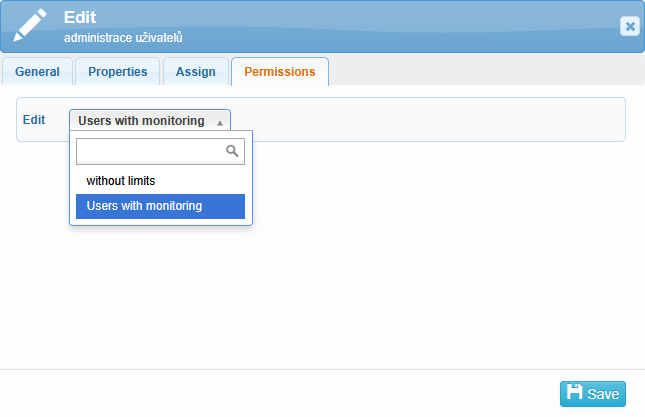
If you want to add an activity to a user’s plan that serves primarily as information for the administrator, you can set the activity so that only Users with monitoring have editing rights.

If you select the Without limits option, users themselves will also be able to edit their activities.

Monitored time on an activity

Activities are highly customizable – they can be used to track worked hours on different projects, departments, or customers (cost tracking), or to monitor the duration of various employee tasks (performance tracking). And all of this can additionally be clearly displayed using Activity Reports.

An activity, or more precisely a specific activity attribute (type: Monitored time), is linked to an access type (function In). These access types are then assigned to HW or SW readers.

All reader models support access types linked to only one activity attribute (one access type = one activity attribute), except for the mobile terminal and the virtual terminal, which support selecting from different attributes across multiple activities (one access type = multiple attributes from multiple activities).

A few simple steps describe how to set up the system for time tracking on activities:

1. Create access types: Administration → Access Types → (+) Add

  • Fill in and set the title, button text reader, icon, and color as desired.

  • The function must be set to In.

Overview table of access types (The monitored time is highlighted in yellow)

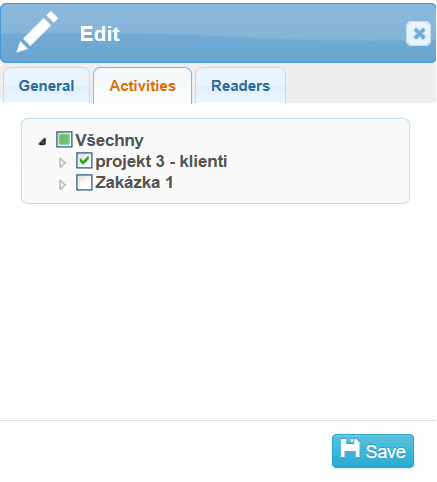
2. Create activities: Administration → Activities → (+) Add

  • Set any number of attributes of type Monitored time (you can also combine them with other attribute types).

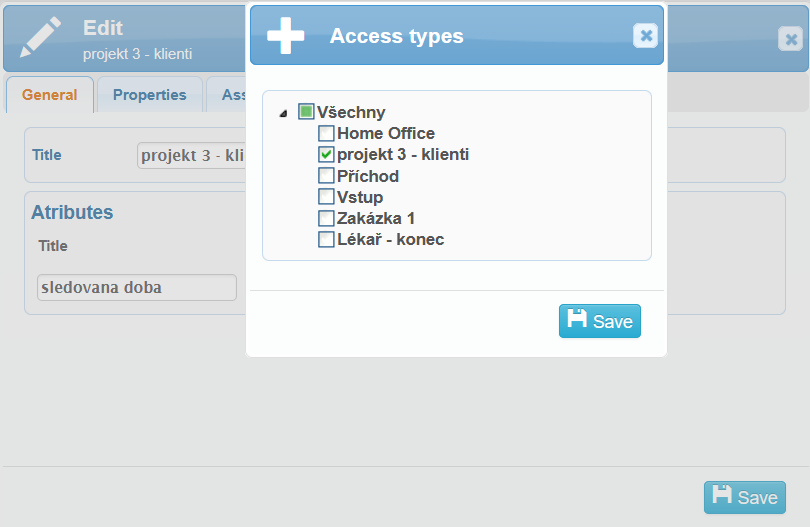
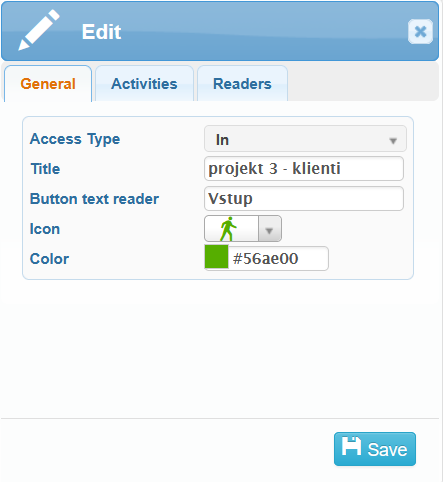
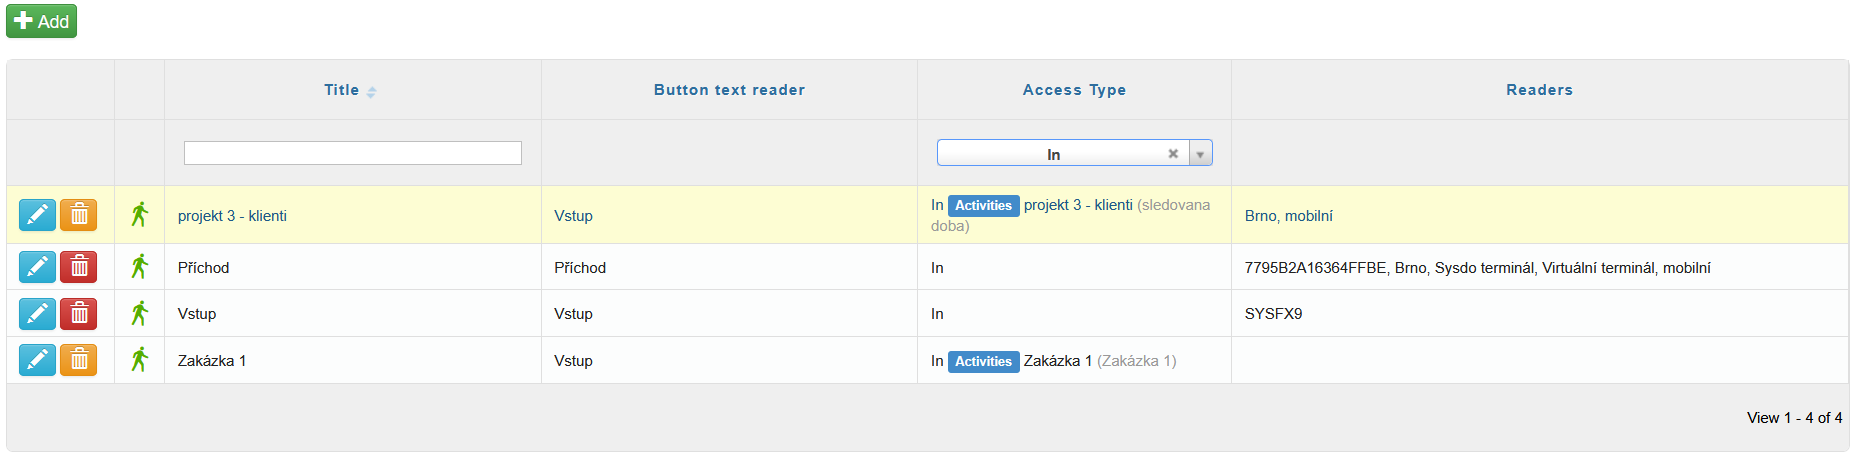
  • Assign the access type(s) to the Monitored time attribute using the Access button.

3. Assigning access types to readers: Administration → Readers → edit reader (Mobile terminal) → Access types

Now everything is set up. Users can record access events (on HW or SW readers) that are paired with an activity attribute. When a user records this type of access, the system starts monitoring the time spent on that activity. Monitoring ends when the next access event is recorded. Depending on the function of the access type, the worked time in attendance is also affected:

  • Function In (Vstup) – stops monitored time on the activity but continues counting worked time in attendance.
    This access type can be a standard type or paired with an activity attribute (monitored time on a different activity will start).

  • Function Pause (Pauza) – stops monitored time on the activity and also stops counting worked time in attendance until the user returns from the pause.
    Returning from the pause can be recorded using a standard access type with the In function or an In type paired with an activity attribute (monitored time on an activity will start).

  • Function Out (Výstup) – stops monitored time on the activity and also stops counting worked time in attendance.

Time (Guarded by shift)

This feature allows you to track the time spent on an activity within the assigned work shift. It can provide a simpler overview of different types of work projects or help optimize work processes.

With this attribute, you monitor the daily work time fund. If a user does not meet the minimum time you have set for an activity, an error is generated to notify you of the missing activity time. This also applies in the opposite case, when a user spends more time on an activity than their actual worked hours. However, in this case, the error will be generated only at the end of the workday or after recalculating attendance at midnight.

Additionally, you can set whether this activity requires approval. Alongside the standard Yes/No option, you can choose Automatic Approval by. You specify a certain number of minutes, and if the time spent on the activity does not exceed this limit, the activity will automatically be approved and reflected in the Summary preview of activity tab.

Instructions for setting: Time (Guarded by shift)

  1. Make sure activities are enabled: Administration – Companies – edit Company – Application tab – Functions tab – Activities: Yes

  2. Add a new activity – fill in the Activity title and set the Attribute – Type to Time (Guarded by shift)Required: Yes

  3. Choose whether the activity requires approval and automatic pre-fill when adding an activity:

    • If you select No for both options, the Start time field will show the current time, and the time (Guarded by shift) must be selected manually.

    • If you select Yes for both options, the Start time field will automatically show the time when the previous activity ended, and the time (Guarded by shift) field will display the elapsed time since the last recorded activity.

    • Both options can also be combined.

Automatic pre-fill NO
Automatic pre-fill YES
  1. Assign users or workgroups

  2. Activity fund settings – after assigning users, go to their assigned shifts and in the new field Activity ideal fund, set the minimum percentage required to fulfill the activity fund (1–100%). Additionally, set the Activity maximum fund, which must not be exceeded.

In the example below, this means that shift-monitored activities may not exceed 60% of the user’s working time.