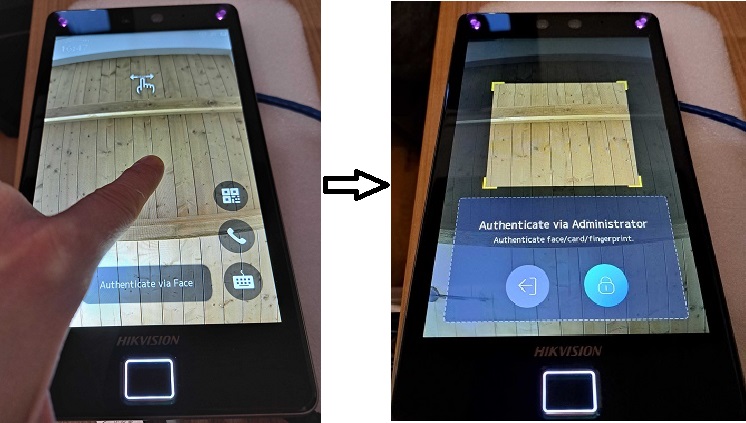
Place your finger on the display screen (not on the fingerprint sensor) for at least 3 seconds, until a hand icon with an extended finger and left/right arrows appears at the top of the screen. Then swipe left or right, and the Verification Menu will appear.
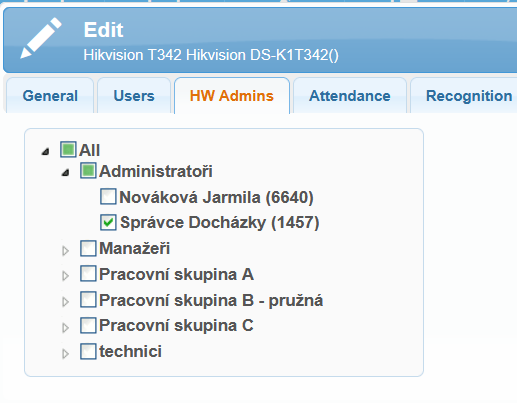
If a Hardware Administrator (HW Admin) is set on the terminal, an authentication window will be displayed for verification by face, fingerprint, or card.
If you want to use the universal administrator password to enter the Menu, tap the padlock icon. If no HW Admin is set on the terminal, the menu for entering the universal administrator password will be displayed.
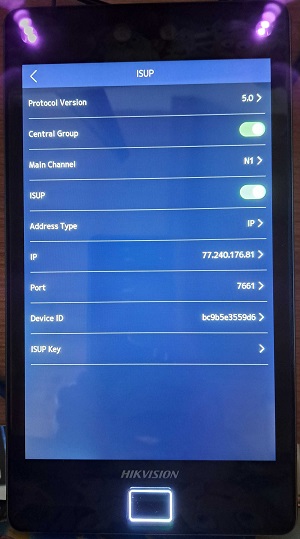
Internet connection is only possible via an Ethernet cable. The IP address is set to DHCP by default. Once connected to the internet, communication with the SYSDO server is established automatically. If the connection does not work correctly, you can check the terminal settings as shown in the image.
Menu → Comm. → ISUP
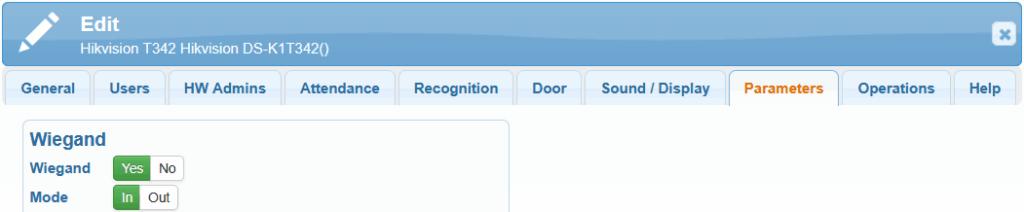
Communication settings with the server:
Protocol Version: 5.0
Central Group: check
Main Channel: N1
ISUP: check
Address Type: Domain Name
Domain Name: data-parse.eu
Port: 7661
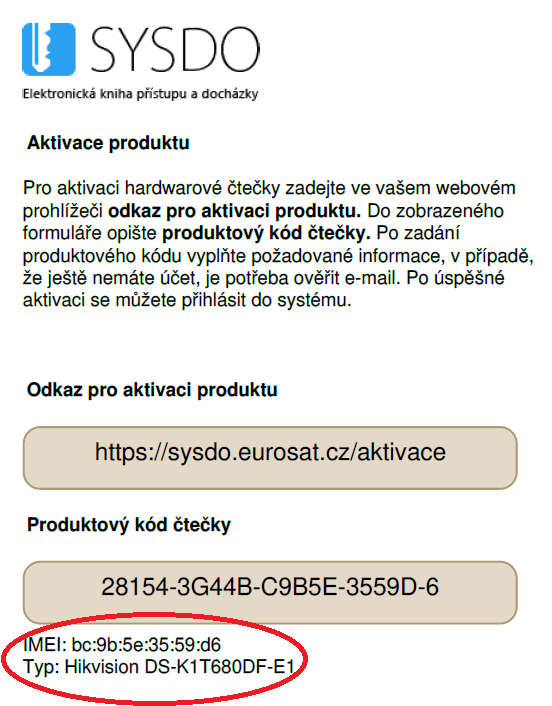
Device ID: bc9b5e3559d6 (MAC address without colons)
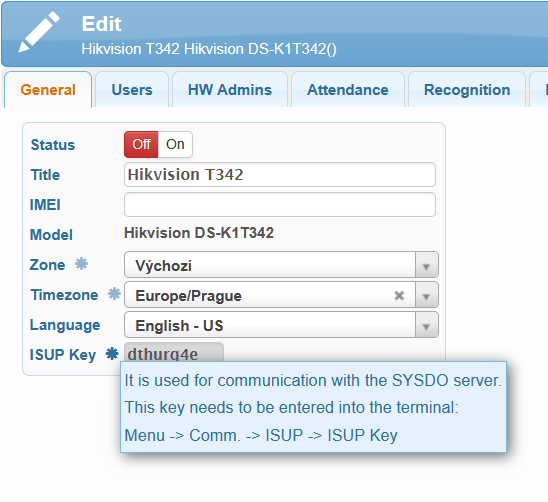
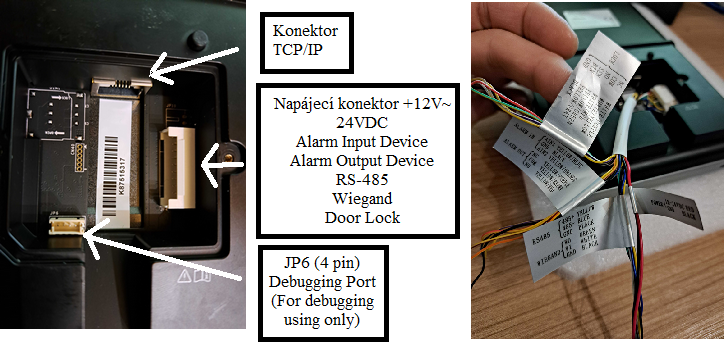
ISUP Key: back side of the terminal, box, or Product Activation document
You can find the MAC address in Menu → Maint. → System Information → MAC Address.
Both the MAC and ISUP Key are also printed on the packaging box, on the back side of the terminal, or in the document supplied with the terminal.

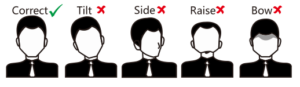
Maintain a natural facial expression during verification, just like in the picture on the right.
Do not wear hats, sunglasses, or other accessories that could interfere with facial recognition.
Make sure your hair does not cover your eyes, ears, etc. Heavy makeup may also prevent proper identification.
- Head position:
For a high-quality and accurate scan, look directly into the camera.
- Head position:
Make sure your face is centered on the display.
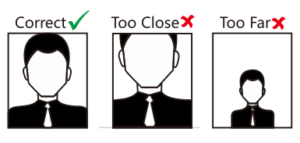
Ideal position for facial verification (see image below)
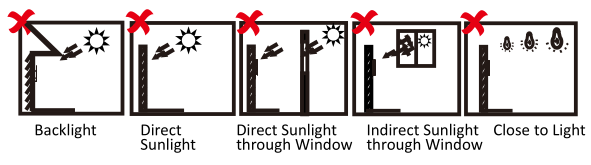
Installation environment:
- Avoid backlighting, direct sunlight, and indirect sunlight.
- For better recognition, there should be a light source in or near the installation environment.
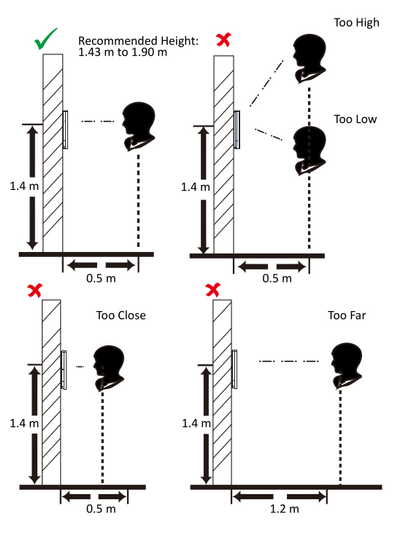
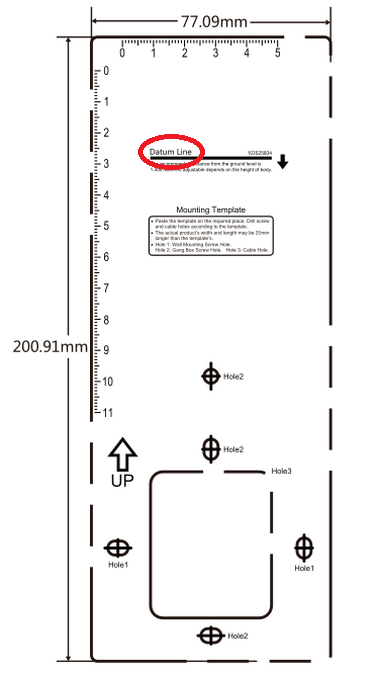
Installation Instructions:
Using the reference line (Datum line) on the installation template, attach the template to the wall or another surface at a height of 1.4 meters above the floor.
Drill holes in the wall or other surface according to the markings Hole 1 and Hole 2 on the installation template.
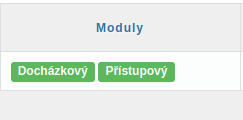
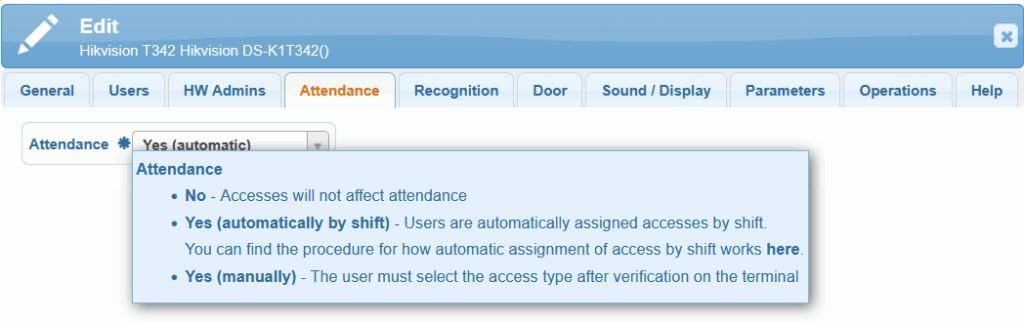
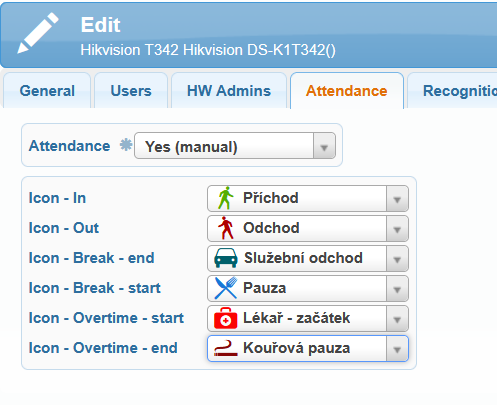
At the company level, one of the following modules must be enabled in Full or Simple mode:
Attendance system
Access control system
Technical support can assist you with this configuration.