You can add new timezones to the system using the icon ![]() in the top left corner.
in the top left corner.
After selecting it, an Add window will appear, where you enter the name of your time zone and select the days/holiday the zone should apply to (to select a day, check the box to the left of the day’s name). By clicking the icon ![]() , a window will appear allowing you to define a time interval. You can either select an interval from the dropdown list of saved time intervals, or set your own interval using the icon
, a window will appear allowing you to define a time interval. You can either select an interval from the dropdown list of saved time intervals, or set your own interval using the icon ![]() .
.

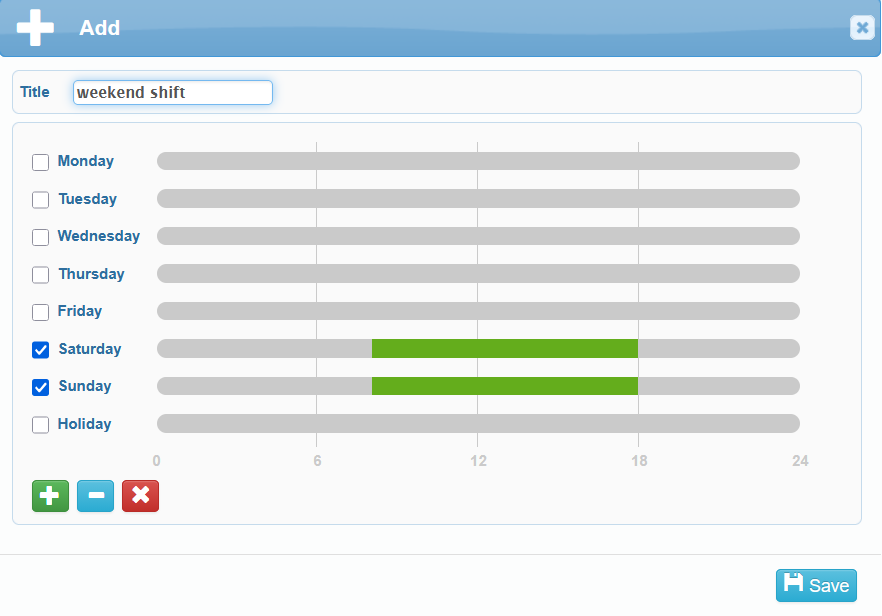
The selected interval is saved, then saved again, and it will appear in the table as green rectangles on the selected days.
Individual time intervals can be deleted using the icon ![]() or by clicking directly on the specific time interval in the graphical table.
or by clicking directly on the specific time interval in the graphical table.
You can also delete all configured time intervals at once using the ![]() icon.
icon.
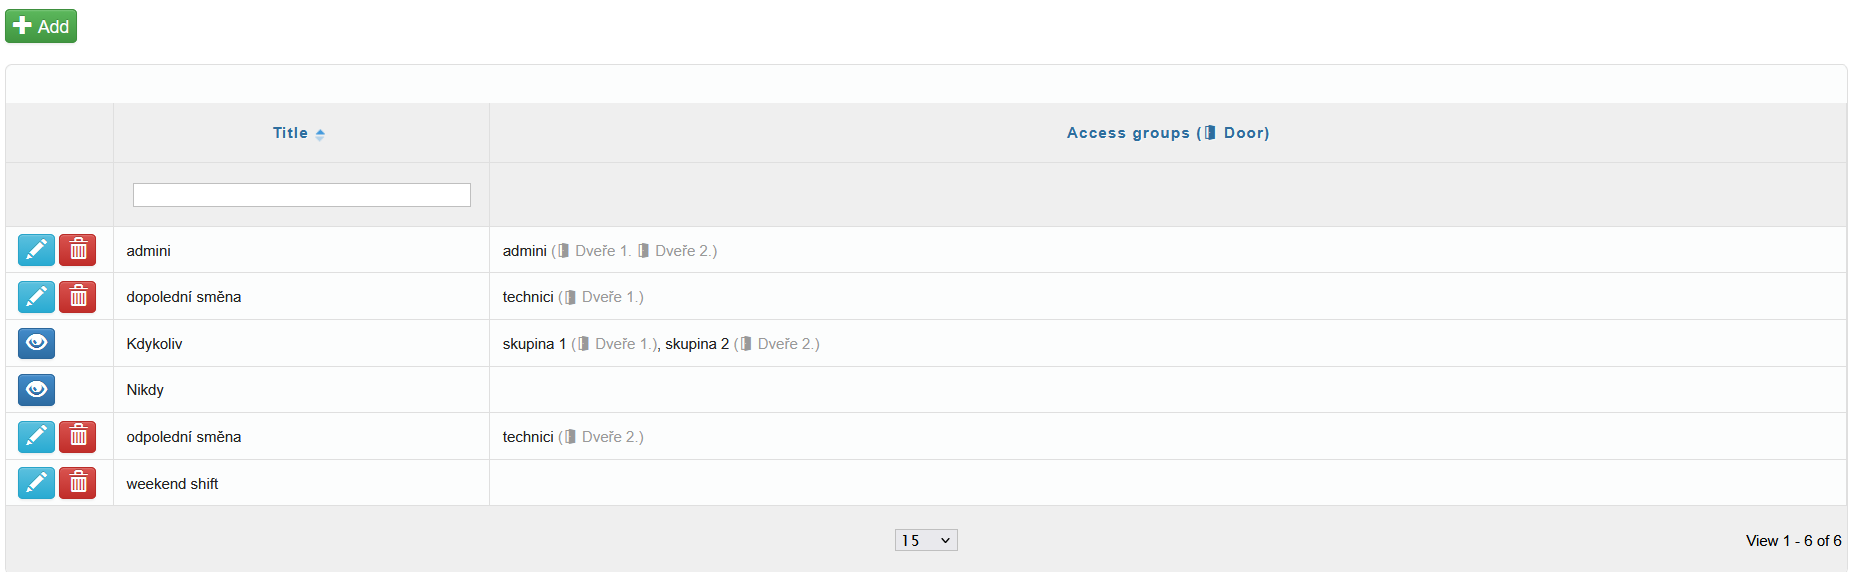
All added time schedules are displayed in the overview table. Time schedules can be edited ![]() or deleted
or deleted ![]() from here.
from here.
The table also displays the access groups assigned to each time zone and the doors that fall under the respective time zone.
“Never” and “Always” are predefined system time zones. The “Never” zone has no time intervals set, while the “Always” zone covers all 7 days with a continuous time interval.