Configure the HTTP settings as shown in the picture:
- Enable:Check
- Port: 80
- Press the SAVE button
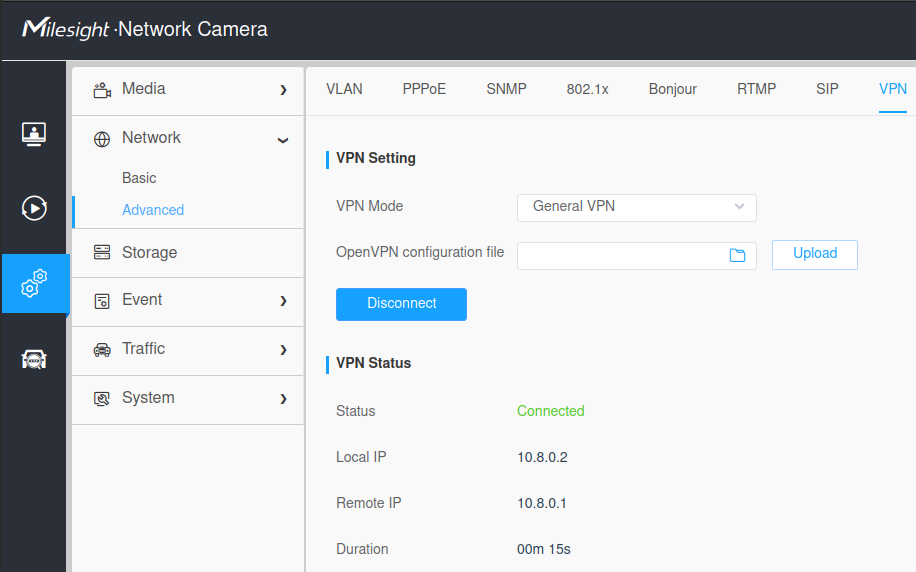
Configure the VPN settings as shown in the picture:
VPN Mode: General VPN
Open VPN configuration file: Select the file SYSDO.ovpn
Click the Upload button
You can obtain the SYSDO.ovpn file from technical support.
After a successful connection, VPN Status – Status Connected will be displayed.
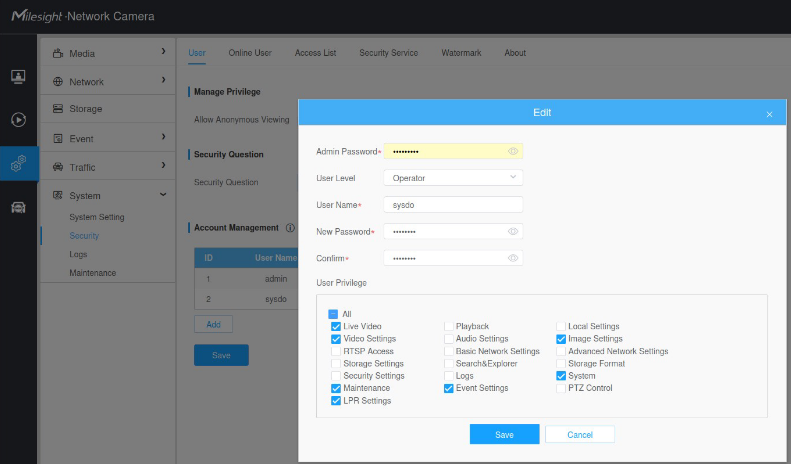
Adding user sysdo:
- User Level: Operator
- User Name: sysdo
- User Privilege: Check
- Live Video
- Video Settings
- Maintenance (for upgrade firnware)
- LPR Settings (for licence plate registration from SYSDO)
- Event Settings
- Image Settings
- System
- press Save button
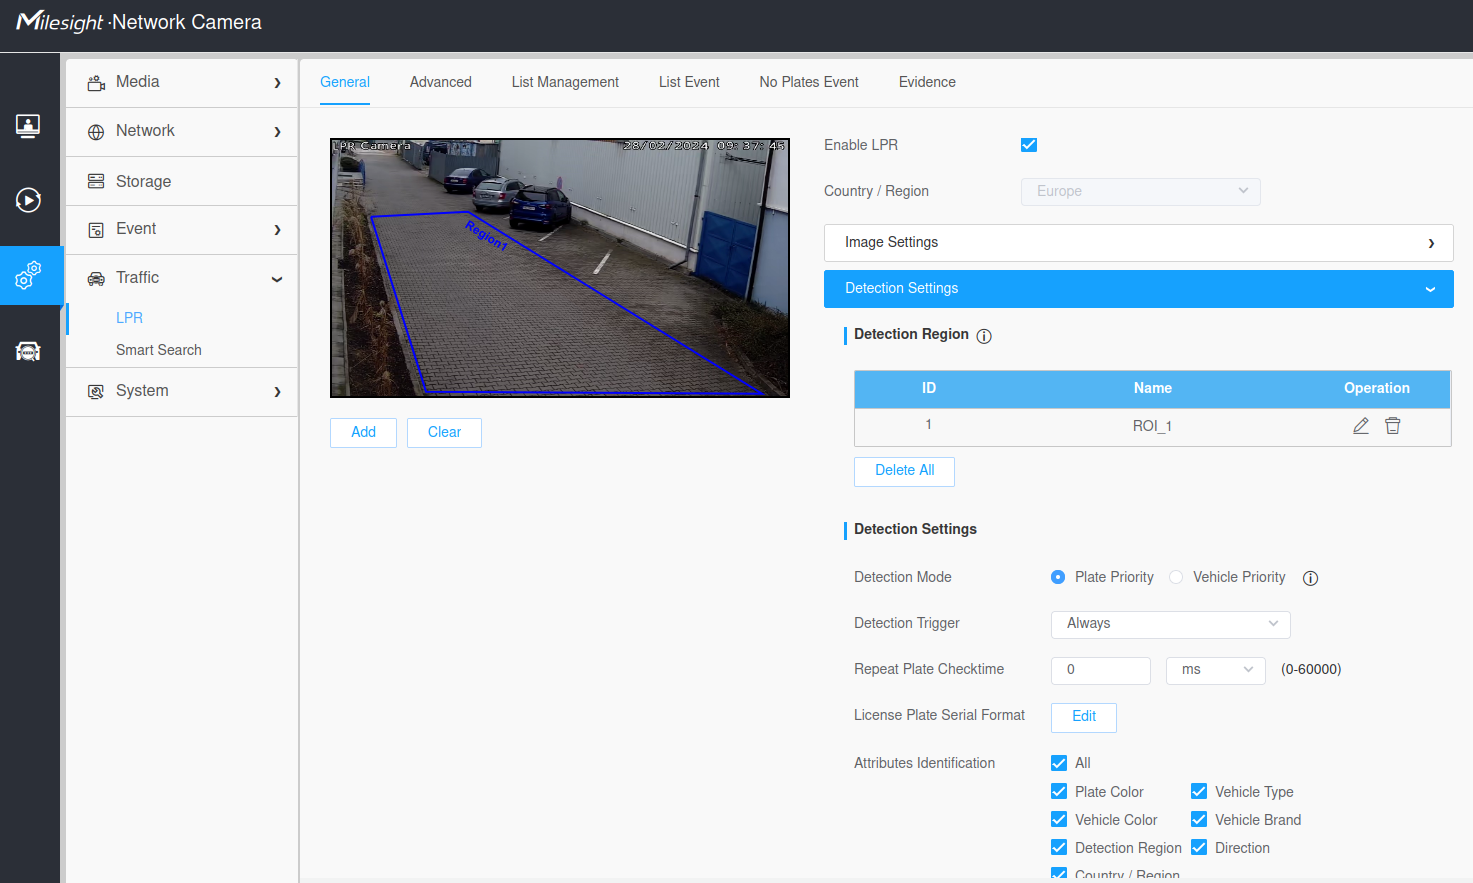
Draw the region with your mouse. To draw the area, click on a point in the image with the left mouse button. Select 4 points—the area will automatically connect. Click the Add button below the image. The area will appear in the Detection Region table. The camera will only recognize license plates within this area.
Next, configure the Detection Settings as shown in the image:
Detection Mode: Plate Priority
Detection Trigger: Always
Repeat CheckTime: 0 ms
Attributes Identification: All (check all options)
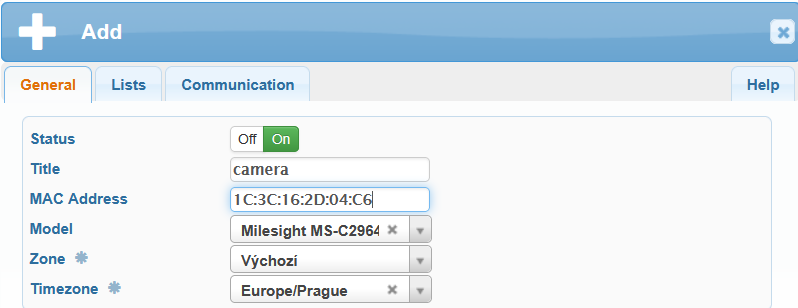
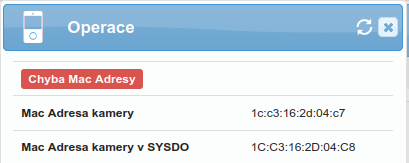
You can find the MAC address in the camera’s web interface: Settings → System → System Setting → System Info → MAC Address.
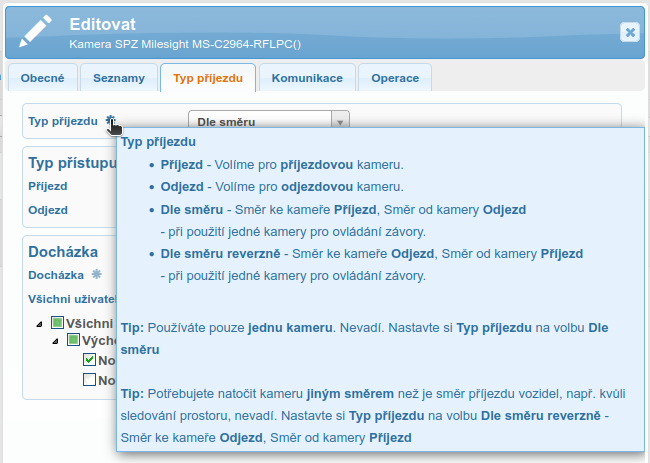
Type of Arrival:
Arrival – Select for an entry camera.
Departure – Select for an exit camera.
Based on Direction – When using a single camera to control a barrier:
Direction toward the camera: Arrival
Direction away from the camera: Departure
Based on Direction (Reversed) – When using a single camera to control a barrier in reverse:
Direction toward the camera: Departure
Direction away from the camera: Arrival
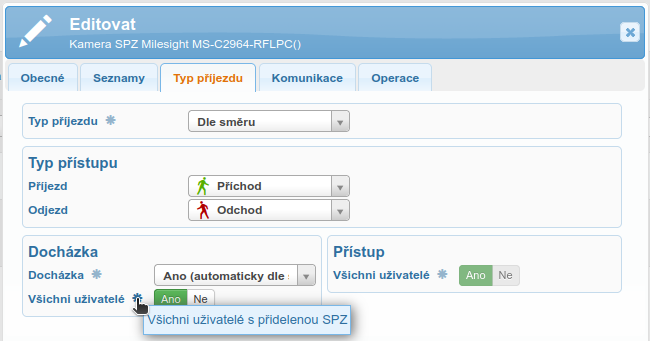
If the message ‘No users with license plates available.’ appears, you can safely save the camera settings and then assign license plates to users in the user administration (SYSDO – Menu – Administration – Users). After that, return to the camera settings to assign the users.
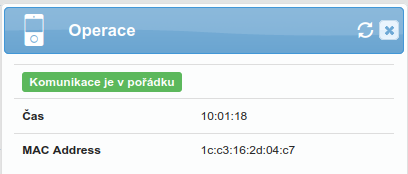
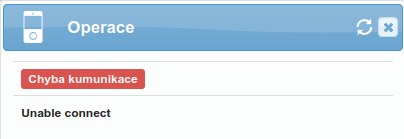
Set up the Camera Communication as shown in the image:
IP – Enter the camera’s VPN IP address, which can be found in the camera’s web interface: Settings → Network → Advanced → VPN → VPN Status → Local IP, e.g., 10.8.0.2.
Port – Enter the camera’s HTTP port, which can be found in the web interface: Settings → Network → Basic → HTTP → Port. Default is 80.
Login – sysdo (the camera user)
Password – Enter the password for the sysdo user
Click Save and check the communication.

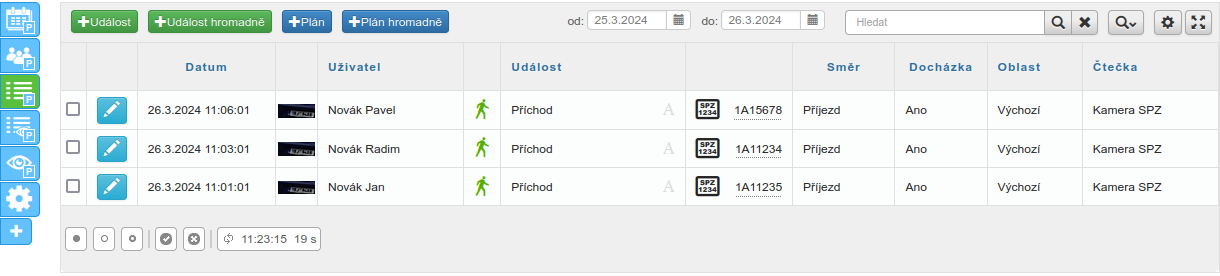
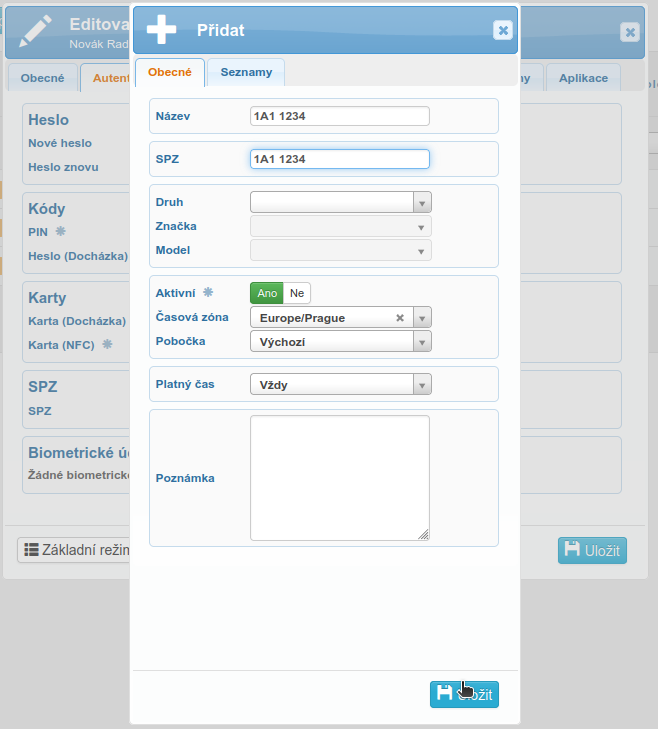
SYSDO – Menu – Administration – Users – Authentication tab – License Plate (SPZ).
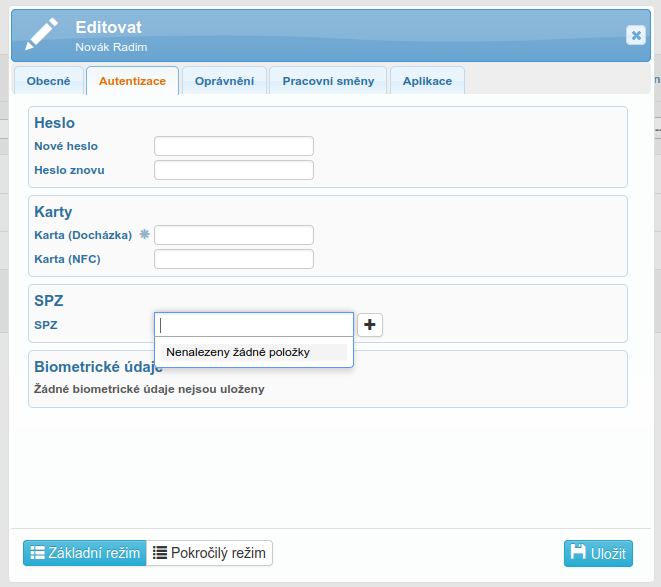
Use the + button to add a license plate (SPZ) to the system. After adding the SPZ, save the user’s edits.
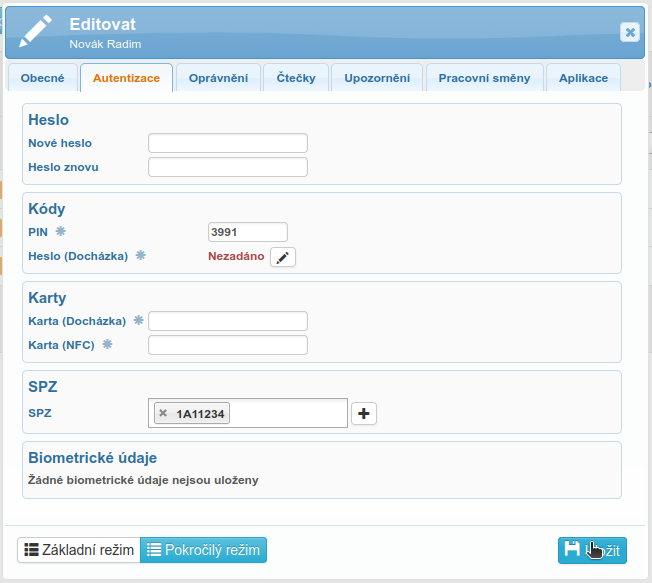
An SPZ icon will appear in the users table.