In the Preview alcohol testing ![]() tab, you will find an icon
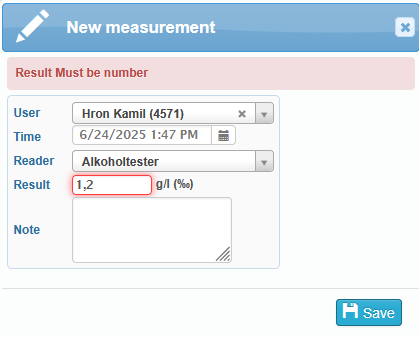
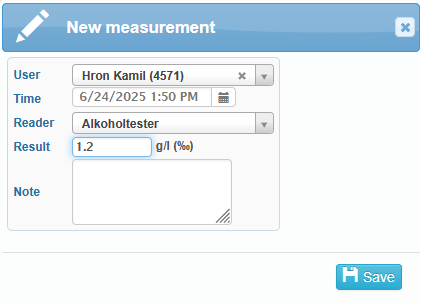
tab, you will find an icon ![]() in the upper left corner. This allows you to manually enter data for a New Measurement. You can select a user, specify the time, choose the reader, enter the result from the alcohol tester (optionally including the upper tolerance limit), and add a note if needed.
in the upper left corner. This allows you to manually enter data for a New Measurement. You can select a user, specify the time, choose the reader, enter the result from the alcohol tester (optionally including the upper tolerance limit), and add a note if needed.
If you select an alcohol tester that is assigned within SYSDO, the alcohol tolerance limit will be automatically applied according to the settings defined in the Alcohol Tester Administration section. Once all information is entered, save the new measurement.
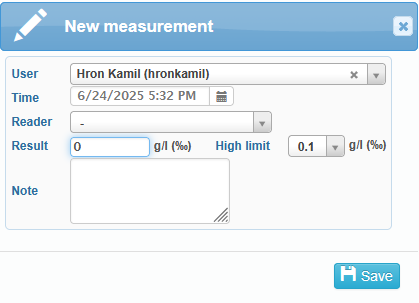
If you are using an external alcohol tester that is not integrated into SYSDO and you want to enter a new measurement, you must manually define the alcohol tolerance in the “High limit” field.
The second icon in the upper left corner is used for Remote Alcohol Testing ![]() . First, select the User you want to test.
. First, select the User you want to test.
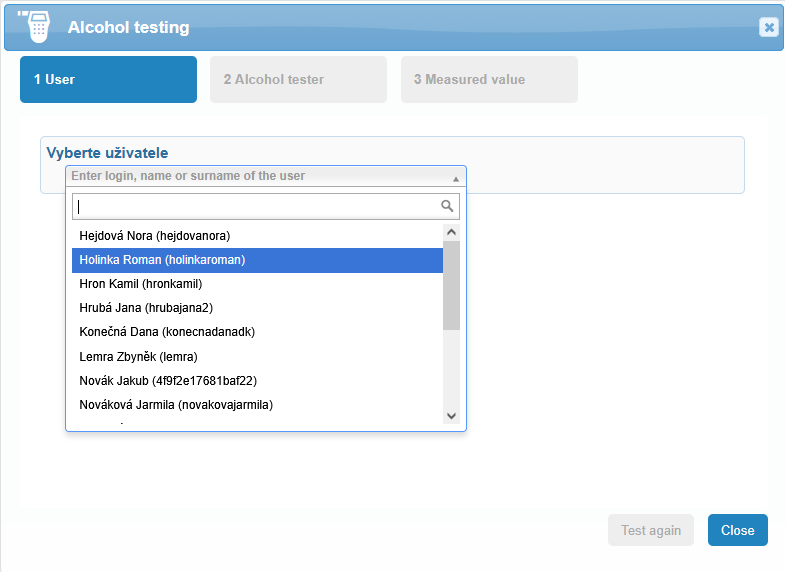
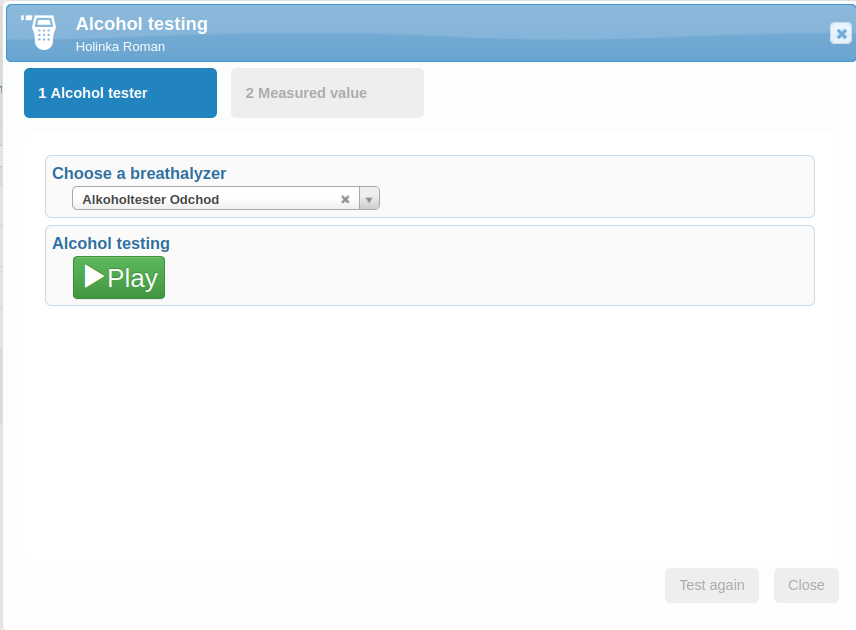
The following images illustrate the procedure starting from step 2 Alcohol tester. In this procedure, remote login is already enabled on the specific user’s page, and therefore step 1 User is omitted. The step is the actual testing. In the Alcohol tester tab, select the device and click the icon Play.
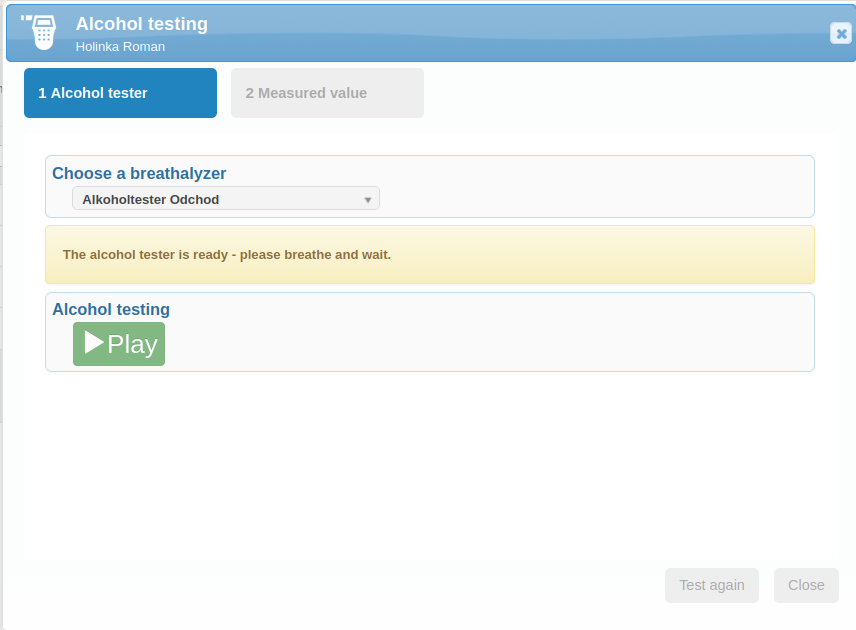
After a short loading period, a notification will appear indicating that the alcohol tester is ready. The user can then blow into the device and wait for the result to be displayed.
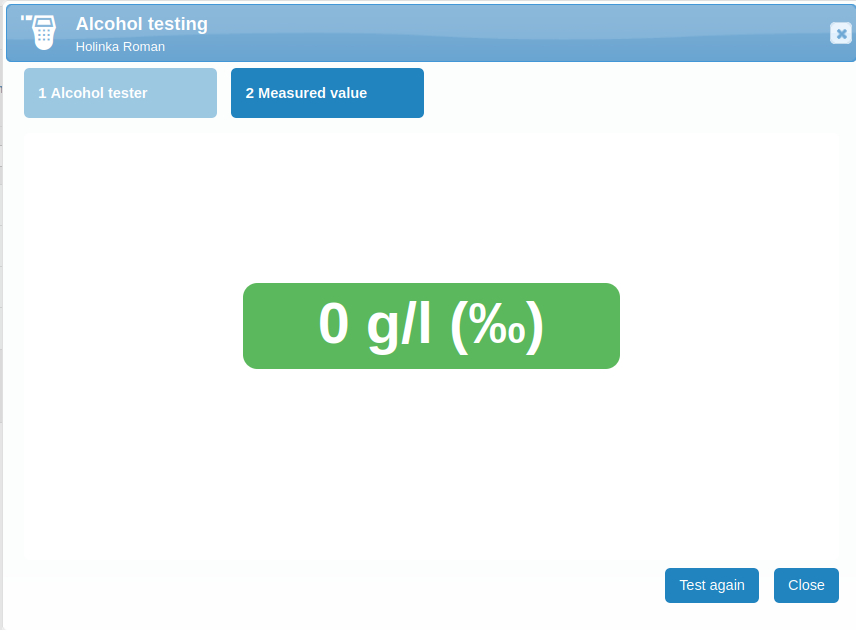
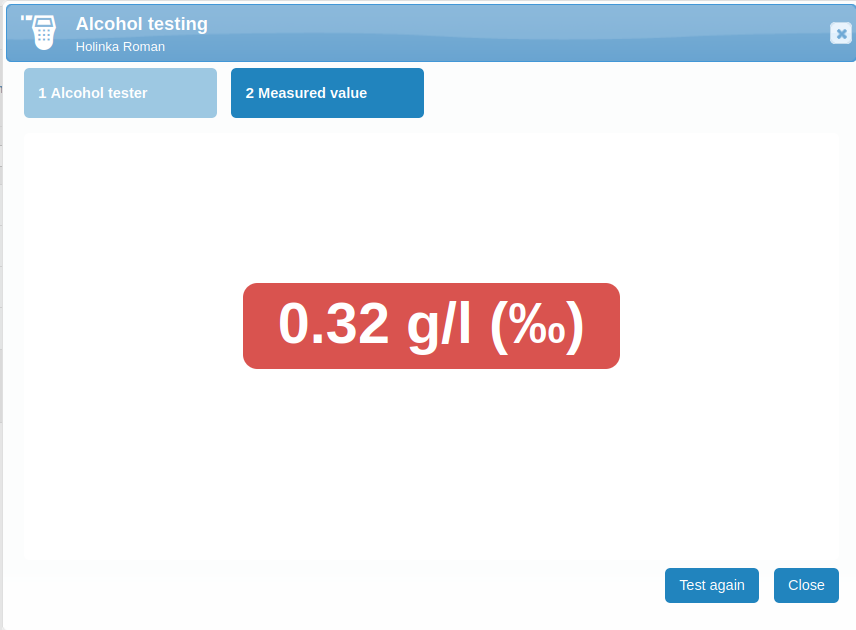
In the final step, the measured value will be displayed. If the value is within the tolerance limit — that is, up to the value defined in the High limit section — it will appear in green. If the measured alcohol level exceeds the set High limit, the result will be shown in red.
All results are recorded in a clear table that includes the following information:
Date of measurement
Photo of the tested user
User name – this column may also display the editing status (e.g., Edited, Invalid)
Event icon
Event name (e.g., Departure, Arrival, etc.)
Measurement result
green if zero or within the tolerance limit
red if it exceeds the set limit
Information on whether the test was performed using a breathalyzer
 or entered manually
Zone
Reader

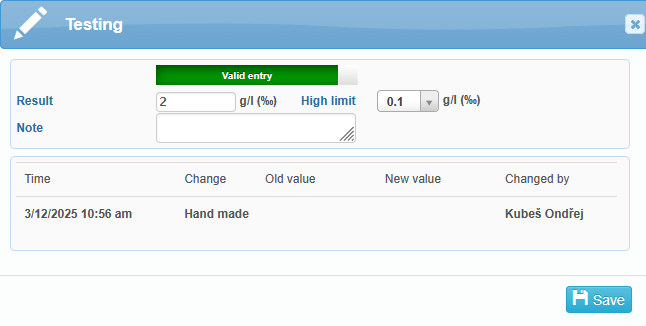
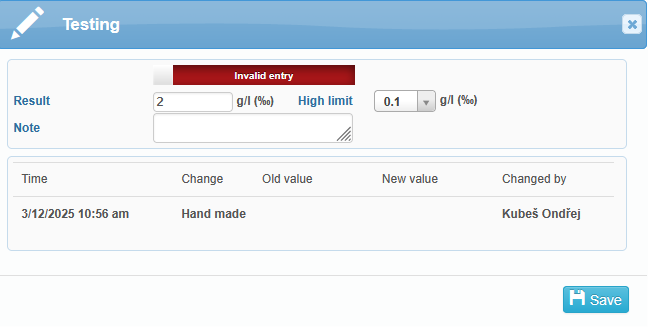
Each record can be further edited ![]() . By clicking on the green Valid entry box, you can invalidate the entry. Don’t forget to save your changes afterward.
. By clicking on the green Valid entry box, you can invalidate the entry. Don’t forget to save your changes afterward.
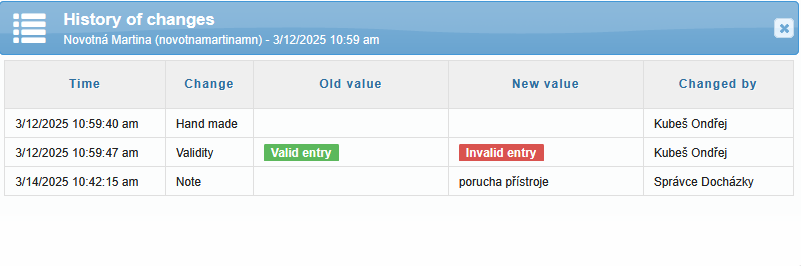
In the User column, information about the edit status of the specific record will appear ![]() . Clicking on this icon will open the History of changes window.
. Clicking on this icon will open the History of changes window.
On the right side of the table header, there is a section for selecting record filters. Here you can set the measurement date or manually search for a specific user. The Advanced Filtering icon ![]() allows you to filter records by the columns Result, Zone, and Reader. Advanced filtering applies only to the currently displayed table and is not permanently saved in the system settings. When the table is reloaded, the filter resets to its default state.
allows you to filter records by the columns Result, Zone, and Reader. Advanced filtering applies only to the currently displayed table and is not permanently saved in the system settings. When the table is reloaded, the filter resets to its default state.
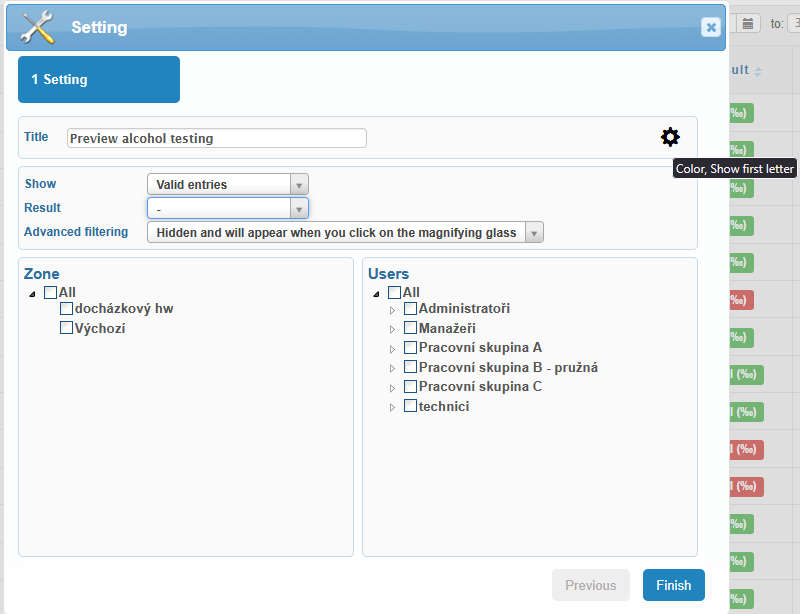
The adjacent Filter Settings icon ![]() is used to configure filters that will be applied permanently. These filters are automatically applied each time the table loads, allowing you to customize the display according to your preferences. In the Title section, you can not only set the tab name but also change its color or display the first letter using
is used to configure filters that will be applied permanently. These filters are automatically applied each time the table loads, allowing you to customize the display according to your preferences. In the Title section, you can not only set the tab name but also change its color or display the first letter using ![]() the available options.
the available options.
The last icon ![]() is used to expand the table to full browser window size.
is used to expand the table to full browser window size.